How to make a map treasure
Take a sheet of wrapping paper of the desired size. If paper is white, it is better to toned "under the antiquity". To do this, make a background of light brown. Give dry.
Apply on a sheet of the area of \u200b\u200bthe area, where the treasure is already hidden or will be hidden. For example, draw the plan of the yard or country area: buildings, tracks, trees. Give the place where the treasure is buried, conditional sign. Optionally, you can encrypt the card - for example, instead of the image of the house, draw the rebus, in which the word "house" will be encrypted.
Gently burn the sheet on which the map is drawn, along the edges from all sides. Fold a map several times. Ready!
Who among us did not play pirates in childhood? And who did not dream of finding a treasure? All in your hands: hide your treasures, draw a map. Well, let it be waiting for a prize! - wrapping paper
- Gouache
- Brush
- matches or lighter
- Flomasteri you big map, for example, the size of the watman sheet, it will be more convenient to tonn it with a brush, but a sponge for washing dishes. Sponge, of course, should be clean.
Spring Cosmetic Collection from Victoria's Secret
Graphic Liner Pen Victoria's Secret liner. Want to bring your eyes or draw an ideal arrow? This product with a quick-drying formula will come to your aid! Released in black.
If you do not have a ready-made painting bag, do not despair, the hu can be brewed at home. To do this, boil 500 ml of water, add two teaspoons with top of ground coffee and black tea, boil for an hour and then strain. During this time, we spend twice through the frequent sieve of 30-40 g of pure green powder of henna. Hot liquid gradually add to powder until the paste acquires sugar consistency. It should be thick rather than liquid; You can dilute and then. If lumps appear, the paste need to wipe through the sieve. One or two teaspoons of Lyme juice will make color more intense. Before using the paste, cool for three hours. You can apply it with a wand, tassel, toothpick or from a syringe tool. The latter can be easily made independently. To do this, take a piece of durable plastic measuring 20x16 cm (package for garbage or for freezing products), minimize the corner with a kule, glue along all seams and by the edge (for example, adhesive tape or adhesive plate). Fill the cules for two thirds paste with a teaspoon, the upper edge begged several times and secure the adhesive tape. In the acute lower edge to pierce the needle a small hole. But - a little!. Wheel Henna went uniformly and neatly. After drawing a picture of the hand, it is necessary to lubricate with lemon oil .. that carefully, squeezing the hnu from the tube (kulechka). Drawing an hour .. there is no need to scrape the dried henna - let it disappear itself - the drawing will be kept strong
| 0 | 0 | 0 |
Competitions for children
(for birthdays and children's holidays)
1. To sit on a stool, clap legs and, without touching the floor with legs and hands, get the teeth of the boxes of matches, standing "on the ass" in one of the rear legs stools. You can spin on a stool as you like.
2. Skipopluia
Competition is surprisingly simple!
Who will turn further to the nipple, he wins.
3. Children are divided into two teams. One team will "cook" soup (call vegetables), and the other is "compote" (call fruits). They say in turn. Wins the team that called more words.
Option: Play no teams, but two people.
4. Two teams participate in the relay. At the signal, representatives from each team ride on the pots of chairs to a certain mark and returned back, transmit pots to other team members, etc., what team will cope with the task faster?
5. Children stand back to moms. Mom (chooses Ved.) Says: "Your mother came, brought milk." That child who recognized his mother raises his hand.
6. Game - fun for children and mothers on the holiday. Appeal to adults:
"Look at how you grew up your kids, what are they smart and beautiful. And remember, quite recently, those sleepless nights have their beds? Already this cry, you probably remember for a long time? Check? Moms turn away, children shout
"UA-UA", moms must guess the voice of their child.
7. Figure on the back.
Fascinating fun game for family holiday And for the children's holiday. Sit around, pre-attaching your scotch on the back of each sheet of paper. Further on the principle of the game, "the spoiled phone is transmitted to the ear of the words to each other. Words should be not difficult, so that they can be depicted. For example: house, sun, flower, man, table, etc. But words are transmitted in the form of drawing - On the back of the previous person, you need to draw an urgent pencil what the leading one said. The one on the back of which was painted, I must understand what our neighbor is about, and donating on the back of the player to the player . It is impossible to watch! When everyone is finished to draw - fun is provided!
8. Magic thread.
This game is that for the child in the room hide a gift, and it is tied with a long string. Give the tower the tip of this string and send in search of the cherished treasure. Great game for a birthday or holiday. To complicate the task, you can skip a string through the door handles, to tie out some large item, hide it under pillows or cubes - to arrange a kind of "obstacle course".
| 0 | 0 | 0 |
How to draw the right oval
For a start, find out what the oval is (from the lat. Ovum - egg): convex closed flat curve without angular points, for example, ellipse.
Now we find in the farm any cup and put it at a short distance from yourself (up to 1 meter).
If you are sitting much higher than a cup of, for example, you are sitting on a regular chair, and they put it on a children's chair, then you see the ellipse almost not flexible. If you put a cup somewhere at the level of the eye (the so-called horizon line), then the oval turn into a narrow strip with rounded edges.
So, choose the position for the cup.
Now, armed with a pencil spend from hand (without the help of a ruler), two perpendicular lines.
The one that is vertical is very important - it is called the axis of symmetry, and is the basis for all further constructions.
The next stage is associated with the way of sight. It is to cover one eye, pull out a hand with a pencil and notice on the pencil, what is the length. It should be noted two extreme dots On the horizontal axis so that on the left and right the distance was the same.
Now, with the help of a pencil, we repeat the same operation, but now for the vertical axis, to determine the width of the future oval. We celebrate it with two extreme dots, symmetrical in relation to the center.
The next pair of lines also spend through two horizontal points parallel to already drawn. According to the rules of the perspective in the figure, parallel horizontal lines are removed in the depth of the depths are departed outside the paper sheet. Draw the continuation of these lines to trace where they will not have any possibility, no need. In drawing the direction of these parallel straight lines determine the eye.
So, we get the last missing point on the vertical axis. She was needed in order to spend an arc through it, in a drawing far from us.
We also hold the arc closest to us.
Carefully erase the auxiliary lines (axis parallel straight).
Upon completion of work, the figure clearly shows that the distance from the center of the cup to its back wall is much shorter than the distance from the front wall to the center. Look at nature, is it so? If you have done everything according to the instructions, then in the future the bottom oval of the cups (Ronyshko) will not cause any difficulties.
It is pleasant not to depend on computer programs, but to be able to draw by hand. Until now, even among computer designers it is very valued. What to say about simple users for whom to master these programs sometimes hard work, but by the hand of the Naris
| 0 | 0 | 0 |
How to draw a painting painting
Select watercolor paints. It makes it easier to start painting the picture. They can convey all shades and give brightness when translucent. Choose, on which surface you will draw - wet or dry. When drawing on a wet surface, the outlines of objects are blurred, which is useful in the landscape compositions or with the background fill of vegetables and fruits.
Take the drawing Watman - it does not swell from excess water, and the places you need to fix, you can easily wash off with foam rubber. Place the paper under the tilt of 30-40 degrees for uniform paint spreading.
Make outline pencil basic items. If it is still life, then determine the location of the table or other surface and fruit and vegetable composition. If this is a portrait, then consider the proportion of a person, and if there is a landscape, there will be easy sketches here - paint will play the main role. In drawing paints, especially watercolor, consider the fact that it is necessary to think over the shade of each smear in advance. It is possible to correct the error with a wet foam rubber. Then, on the already well dried surface, apply the necessary strokes.
Picture a common background with foam rubber or a wide squirrel brush. When painting large sections, follow the brush to have enough paint. Apply a background from a light place to the dark. Please note that the effect of white when painting with watercolor paints is achieved only due to unpainted or well washed water. Make sure not to break the paper and do not roll it with rollers.
Determine the sunny side and shaded places in the picture. Stripping from this, sketch all items. Mix the paints on the palette - in the figure, the overlap of the color layers can lead to a simple distortion of the color of dark shades. Each next smear applies next to the previous slightly moistened tissue for a smooth transition.
Pictures drawn by paints have a gift to attract your eyes to themselves. The unique game of shades allows you to transfer everything to the smallest detail. But how exactly do painting painting? - Drawing Watman,
- Pencil,
- eraser,
- Paints.
How to draw anchor
Draw a modern anchor design with two sharp edges below. In the middle of the sheet, swipe the vertical line, slightly narrowed at the top and extended at the bottom. It will be spine anchor. Around the upper border of the spindle. Picture a circle, so-called. Ry is the place of attachment of the cable or rope to raise or lower the anchor. At the top of the vertical, swipe the horizontal line. The bottom of the spindle is fixed by a large check mark.
Draw individual parts of the anchor in more detail. The spindle depicting in the form of two straight lines, each of which is downstairs to be reserved in different directions, forming an anchor, its main part. Thus, get two horsh anchors. The lines joint should be smooth. Make each horn volume, adding another line, repeating the outlines of the anchor. At the tips of the horns, there are lops - wide plates with sharp external vertices. Please note that the heel of the anchor must be sharp enough.
Draw in detail the rod. From the inclined straight line at a short distance, spend another with the same slope, but slightly convex, thus distinguishing the side and lower part of the rod. Connect both lines with multiple vertical strokes. Now draw another repeating outline of the inclined line and continue the vertical touches at an angle slightly large 90 degrees. Over the upper rod border, you will show a neck - draw a small rectangle and divide it in half the vertical line. Ring Ryh Make Double.
Dimmerly individual armature sections: lower part of the lope and right horn. Schod Strike with short lines and neck, its right side. Also dink the spindle area, which goes along the right boundary of the vertical, - drawn anchor is ready.
Anchor is a special metal structure that is designed to secure the ship in one place. It has many different species, but the basis is always one - a heavy bottom, which is fixed on a straight metal vertical. Drawn anchor is most often used as a marine symbol. - Album leaf;
- pencil;
- Eraser.
| 0 | 0 | 0 |
How to draw a cat with a pencil
Cat is one of those animals that cause sympathy in people of different ages. Naturally, she wants to draw it, yes as possible on more realistic. And what is in it: four paws, torso, head, ears, tail and all this grouped together - the cat is ready. It is easy, but you have to do everything correctly and in order not to disappoint yourself and those around your creative talent.
First, as a rule, make sketches. We draw the main forms of the animal, that is, head and torso. Pick the circle to the head for the head and the rough oval of the elongated type for the body.
Now we work on the lines. They should not be rude as we ran first. Giving the form and position of our cat, we try to make smooth, smoothly flowing lines.
Next face. We draw a cross on a circle, which is head. The cross is needed to show where the animal will have eyes, nose and mouth.
In the corners, we have triangle - this is a cat's ears, which is important for such a predator.
Next, we pay a cat with a paw and cite from above the tail.
For consumerism, I still score the fur.
The cat is almost ready.
We erase unnecessary sketches and lines. After completing some nuances (location of the rear paws, wool, shadow from the animal).
The last time the mustache is drawn, remember which cats they are and reproduce the same. Your cat should work out excellent, experiment on.
Drawing is an art that do not take away from the owner. People from Mala to Velika can create on a piece of leaf that only they do. If you just learn and want to draw beautifully, let's say, the cat, then you here! Pure album leaflets, pencils (can be colored).
| 0 | 0 | 0 |
Pastel drawing - Cat breed Egyptian Mau
1) In this lesson, I will tell you how to draw a cat's cat in the Egyptian Mau. These are very beautiful cats with close-up green currant color or yellow-amber. W. Egyptian Mau. Wonderful and unique color. This is their distinctive feature. For this painting, we will need a pastel sheet of dark blue format A4. White, well-sharpened pastel pencil make sketch.
2) Go to drawing eyes and nose. For eye, use green, yellow, dark orange, black pastel pencils. Strip neatly eyes, pupil Make black, at the end add a white pastel pencil glare. For the nose, use white, pink, black, red pastel pencils. Around the eye and nose stitch slightly white pencil and scroll with your finger. When drawing such small details, your pencils must be well sharpened!
3) Strike ear first with a pink pastel pencil, and on top of a white pastel pencil. Distribute your finger. Add black shades and scroll. Now you have a good white pastel pencil and draw white hair with rapid and light movements.
4) Cat's head Strike with white and gray pastel pencil. Somewhere can add several blue strokes. After that, scroll through your finger.
5) We begin to specify the details. White pencil small strokes imitate the growth of wool. Strips Draw with small strokes of black color.
| 0 | 0 | 0 |
How to draw daffodils
Make in the middle sheet outline with a pencil and arrange individual details. At the top, you will depict a hexagon - the basis of the flower itself. To do this, draw two equal trapezes that have a common basis, and convex parts facing opposite to the sides. Draw a middle in the form of an oval and depicting the stem and sheet with simple strokes.
Draw details Narcissa more accurately. From each top of the hexagon, spend straight lines convergent to the middle. These lines will be vertical axes for flower petals. Denote the points of the middle of the lines. Now, with each vertex, swing strokes expanding to designated points. Next, bring the strokes to the middle of the flower already in the form of direct parallel lines.
In order to draw a narcissus, draw the flower petals with smooth lines - grade the main contours. Picture a small wrapping of petals with wavy lines located in their walls. Distribute the middle of Narcissus. First, the borders of the oval make the gently with a small step. On the right side of oval Dorisite a small dome making the middle more volumetric.
Draw a part of a narcissus stem in the form of a tubular arc connecting the flower directly and the straight stem with a wide side pointing to the petals. Plant leaflete shows an eligible non-pointer with a pointed vertex.
Draw a flower with a simple pencil. Middle Narcissa tightly stitch straight thin lines, diverging from the middle to the boundaries of the oval. On the petals, depicting rays running along the vertical middle line. Space and left side of the stem, and the top of the Narcissus sheet.
Draw a flower in yellow. Middle to tone darker. Leaf and stem sketch with a smooth green tone.
Narcissus is one of the first spring colors. Such a gentle and at the same time strict, impregnable, noticing only its beauty. Such beauty can be held for a long time only on the leaf of paper. - Album sheet;
- pencil;
- Eraser.
| 0 | 0 | 0 |
To begin with, think about what you would like to draw the icon. Concept or idea, very important components of the drawing. Check out what will symbolize your icon. Come up with an interesting picture. Make a couple of sketches. If you do not have ideas, go to the Internet and see pictures of various icons, maybe something will come to your mind.
Getting Started, with a pencil, designate the form of the icon. Typically, a round form icon, so to simplify the task and more attention to pay the content of the icon pattern, take the stencil. For these purposes, you can serve as any round item that can be attached to paper and put in a pencil. Use a can of cream or saucer, depending on the size of your icon. You can also use a circuit.
Once you have decided on the size, start drawing. You can draw your favorite animal or flower, write the name of a loved one or your favorite expression, everything that will come to mind. Make a rough drawing with a soft pencil, and correct the extra line of the eraser. After that, think about what color scheme is suitable for your drawing, to start, take the watercolor when the paint dries, take the markers or gouache and make a drawing brighter.

Watercolor dandelions.
Well, the first flowers bloomed. Among them and my favorite dandelions. I have already ()
Watercolor dandelions.
Well, the first flowers bloomed. Among them and my favorite dandelions. I already showed how to draw dandelions with oil, and now I want to draw their watercolor.
First, just lemon and yellow paint draw colored "blots" of future colors.
We will make a place where white balls of ripened dandelions will be located. For this, almost transparent paint and a thin brush, draw a circle and put small translucent specks in it. In the center, the dandelion ball will be much darker than around the edges. For specks you can mix gray, blue and then add a little light yellow paint for shade.
Yellow with the addition of ocher and light-red paint with a thin brush Draw the petals of yellow flowers, not forgetting where the light drops from.
Nisuem background. You can first wet the paper, but you can simply be painted with a thick brush, bypassing flowers and balls, not allowing strong drowshes and drying. See the top and on the left of yellow flowers, you must leave the non-scratched white pieces of paper, like a bright light of light.
We mix pale green paint with yellow and draw stem dandelions. In some places you can add a red shade. Gradually, let's start drawing leaves, leaving no stalks.
The next passage will force the dark color, again leaving the leaves and the new skeners and blades. At the same time, draw stars background around white balls, making them the edge uneven, loose. For the background it is better to take a thicker brush and mix dark green, pale blue, yellow, a little purple.
| 0 | 0 | 0 |
How to draw butterfly
1
Start drawing from building auxiliary lines. First, draw a line that will be the axis of the symmetry of the butterfly body, the head, chest and abdomen will be located along it. Secondly, mark the point in the middle of this line. Spend two traits from it on each side, these auxiliary elements will define the direction of the upper and lower wings of butterflies. Watch that the angles between the corresponding lines and the axis of symmetry were the same.
2
Draw an extended oval located on the axis of symmetry. Divide it into three parts: the first, very small, corresponds to the head, the other two are approximately the same in length - chest and the abdomen of the scraped beauty.
3
Highlight on the head of the eye, they are planted on the sides, as well as rather long mustaches and trull, in a calm state, he will roll into the spiral. If you draw some particular butterfly, make sure that she has a sucking oral apparatus, and not, for example, ricking, like some families of scales.
4
Draw your breasts. All "limbs" of butterflies, if you can call them, are attached to the body in this area. Indicate three segments on the chest. On the second and third from the head it will be necessary to draw wings, but it is better to leave their drawing for later. Picture three pairs of butterfly legs in the form of a drop with pronounced joints.
5
Picture the butterfly abdomen in the form of an oval. Keep in mind that it is quite moving.
6
Start drawing wings. If you depict a concrete butterfly, read it appearance, features of the shape of the plates, their coloring, the structure of the cells. If you want to draw a collective image, you can figure out the shape and dwelling (the presence of cells on the wing plate), as well as the color.
7
Color the drawing. For staining a representative of an existing type of butterflies, use the necessary shades, look at the Internet, what women and men look like. For a fictional butterfly, combine those colors that you like.
In order to draw a butterfly, it is important to imagine the structure of its body, the shape and housing of the wings, to consider in the image the features of the coloring of a particular type of skewers .- paper;
How to draw a boy
How to draw a boy
Prepare a sheet of paper and a simple pencil. Think at what position you will have a boy's figure and, depending on this, lay the paper sheet vertically or horizontally. Using a simple pencil, start performing the sketch.
Initially, with the help of oval and circles, draw a person's pose. Do not rush immediately wash the lacquer failed parts of the picture. It is better to make the right direction with light strokes with light strokes, and then edit the hand-drawn eraser. Check the proportions. The head should be placed in the body seven times, elbows at the level of the waist, palms are of the same size as the face. Measure the pencil of the hands and legs so that they are the same length.
Start drawing parts. Smooth the corners, make clothes and hair. On the head, draw a vertical middle line, a horizontal line of eye, nose and mouth.
Specify the details of the boy's clothing, then draw your eyes, nose and mouth, focusing on the outlined lines on your head. Then proceed to the ears and hairstyle. If necessary - Draw a headdress.
Put the drawing attributes (if necessary) - machine, balloon, Bouquet of flowers and so on. With the help of an eraser, erase all invisible and auxiliary lines. Think the background and its details. Select the materials to work in color and take the palette of your drawing. Perform work in color.
Select the direction of light. Note in the figure shadow. Start filling the drawing from the background downward. Then go to the figure of the boy's shapes. Do not rush to apply the main color right away, do it gradually, specifying the details. If you work a pencil, apply strokes in the shape of the body, clothes. When working with paints, also try to abide by the volume, playing with light, glare and shadow.
To perform a drawing of a boy, you need to properly draw a sketch of a person's figure. Already then you need to give it the corresponding features and, if necessary, draw any attributes. -paper;
-thenta pencil;
-eraser;
-Materials to work in color. Read the beginning of work. Look on the Internet various images of boys, pay attention to the postures.
| 0 | 0 | 0 |
Draw the island pencil in stages as follows:
Stages of drawing island:
1) we make sketches of palm trees and island;
2) Then draw palm trees, draw waves and sunshine:
3) Draw the ship like this:

Here is our result:

And the island can be painted and so:

And so:

And thus:

Various options for drawing the island are possible. I revised a bunch of video. Since I'm so-so Masta, then chose the easiest option. Where to draw the island can also be without much difficulty. So we look:
I think this is not a difficult task, if you just present the landscape of the island.
It is necessary to simply draw water waves, sand and some trees, usually we all represent the palm tree, and then if you want to paint water with a blue pencil and trees green.
Here are video instructions for help:
The island in the ocean must be uninhabited. As in a cartoon from childhood. I really liked the lesson on drawing the island here on such a bright picture:

Ideal for drawing, right? Moreover, as it turned out, in order to portray such a cozy cleaner in the ocean, much is not needed. Enough to follow the following phased instructions:


Island You can draw on top, and you can show that we are almost next to him.
Draw the island with palm trees. For the beginning, we need to hold the line of the horizon. That is, we draw a horizontal straight. Further make sketch. We will make melanchief, the location of the island. It will be placed on the line of the horizon. like this:

If you don't like something, just wash the eraser. Now draw palm trees that we used to spoke. They are simply drawing. Draw a stem and greens.

Will not forget to revive the island). Draw grass. Since the island is at a decent distance and the grass is unrealistic to consider, we draw small islets Herbs. Water around the island show lines.

To draw the island, you need to portray a small piece of land among the sea and show palms on it - the island attribute.

Draw the line of the horizon and the outlines of the island.

You can take the basis of only one palm instead of three at any place island.

Let's notice how the leaves are located on one of the palm trees that right.


At the base of the palm trees will present a small shrub curls, make a clearer and relief trunk. We start drawing leaves of another palm tree and then draw the leaves clearly.
Now we continue to draw palm trees, this time we will look at how to draw three palm trees on the island in open Ocean Phased pencil.
As a basis, take this picture.
Just below the middle of the sheet, we note the horizon, then the lonely island.

Draw three trunks, which in the middle is straight, and the side is slightly tilted aside in which they are located. If you need only one palm, draw one barrel and choose this, where the leaves are drawn to this particular barrel.

Place the location of the leaves from the palm to the right.

Draw leaves. All pictures have a great resolution, so click on them to consider the details.


We start drawing the second palm tree, which in the middle. At the foot of the right palm tree, draw a shrub using or curly. Make a trunk relief. In the next figure you can see in the approximate version.

Click on the picture and carefully look at the leaves, draw them.

We finish the second palm tree and proceed to the third left. Draw bushes again by curls of shrubs on the island.

Draw leaves and trunks in palm trees.

On the island, you will depict a shadow from shrubs and from palm trees, also show dots and small thoughts that he is sandy.

Tree palm trees, imitate the waves of the sea. The sky is simply screwed up with a clouds with a beat, just below the light tone draw the clouds, only barely visible. Our drawing on the island is ready.

« Island in the sea-ocean "- drawing Pentyukhova Alexander (7 years). Pedagogue Temna E.S.
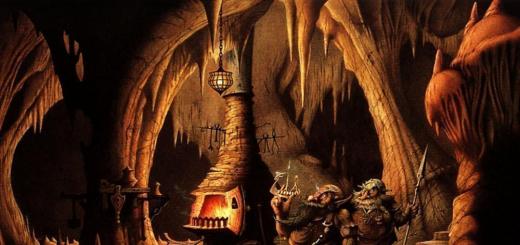
It was fun to walk in the jungle, but it's time to go home. Only our travelers rose up as a sharp gust of the wind ended the ball. The guys were not frightened, because under them there was no longer the Earth, and the smooth surface of the ocean.
But what is there? This is an island! Making stop.
To work, we will need:
- gouache or finger paints,
- brush,
- foam sponge
- simple pencil
- paper sheet for watercolor A3 format,
- children's palms
- and good mood.
1. First on a sheet with a simple pencil draw the line of the horizon
2. We plan the outlines of the future island.

Figure Island in the sea - Collage 1
3. Draw the sky. To do this, in the white gouache, add a little blue and mix. Then a sponge, printing movements, paint the sky.
We try to "not tight" paint, leaving white spots. This will create the effect of clouds.

Figure Island in the sea - collage 2
4. Go to the island. Sponge we apply yellow gouache on the outlines of the island.
5. The island can not be perfectly yellow, so add a little orange or light brown.

Figure Island in the sea - collage 3
6. Playing the sea.
The sea should differ in shade from the sky. Preparing paint. To do this, add white to the blue gouache. And they paint the sponge "the sea". Also, as in the sky, we leave white lumets. This will create an impression of marine foam, waves.
Do not forget that the sea has no pure blue color, but a slightly greenish tint. Therefore, when the "sea" is filled with blue paint, a little green color will be added to the remaining paint. From above on the blue background, we will go with a new tint. The sea is ready!

Figure Island in the sea - collage 4
7. On the island "Sazham" palm. Krees the palm of green paint and put the imprint. Please note that the palm is located with fingers to the island.

Figure Island in the sea - collage 5
8. Put the finger in brown paint and draw the palm tree trunk.

Figure Island in the Sea - Step 6
9. What kind of sea-ocean without a miracle-yudo fish-kit?
We put on the palm of blue paint and put the imprint of the palm somewhere in the sea.

Figure Island in the sea - Step 7
10. White gouache draw whales teeth, fountain and waves on the sea.

Figure Island in the sea - Step 8
11. At the island in installing a monkey. The torso is the fingerprint of the thumb, the head - index, ears. Pens, legs, pussy with a brush.

Figure Island in the sea - Step 9
12. While the smile of Kita dries, draw the sun. We decided to draw his brush.
Finger draw rays.

Figure Island in the sea - Step 10
Welcome to the island in the sea!
"Island in the sea" - Pentyukhov drawing Alexander, 7 years
So funny figure island in the sea-ocean it turned out Alexandra .
This lesson got into the lung category, which means that in theory can repeat it and small child. Naturally, parents can help young children. And if you consider yourself a more advanced artist, I can recommend a lesson "" - he will require greater dooms from you, although it will be no less interesting.
What do you need
In order to draw the island, we may need:
- Paper. It is better to take a mediated special paper: novice artists will be much more pleasant to draw on such.
- Compared pencils. I advise you to take several degrees of hardness, each you need to use for different purposes.
- Eraser.
- Shelf for rubbing hatching. You can use conventional paper twisted in the cone. She Lego will rub the hatching, turning it into monotonous color.
- A little patience.
- Good mood.
Phased lesson
True nature in all its glory can reveal only if drawing it from nature. Draw a lot better if you look directly to the island. If there is no such possibility, then ordinary photos can be helped, which in search engines simply in bulk.
By the way, in addition to this lesson, I advise you to draw your attention to the lesson "". It will help to increase your workshop or just deliver a little pleasure.
Simple drawings are created using contours. You will be enough to repeat something, and only what is shown in the lesson to get an acceptable result, but if you want to achieve something more, then try to present it. What do draw in the form of simple geometric bodies. Try to make sketches not with contours, but rectangles, triangles and circles. After some time, you will see that it becomes easier to draw.
Tip: Create an outline as few thick strokes as possible. The thicker the outline will be - the more difficult it will be erased later.
The first step is more precisely zero, you always need to place a sheet of paper. This will give you to understand where it will be the drawing specifically. If you place the drawing on the half of the sheet - the second half you can use for another picture. Here is an example of the markup of the sheet in the center:
Step one. Let's start with the horizon line. A straight bold line divide the sheet almost in half horizontally. Doodle from above - it is probably a cake in the midst - island.

Step second. Okay, I agree, the clouds did not really work. We remove them and already carefully draw wavy clouds. The top of the island is removed, instead of it - a dense grass on. Slightly fade a pencil.

Step Three. From the diet, we will have a coconut. Singing the whole island of palm trees, where they will fit, so that there is no place to sit even. We will live on the palm tree.

Step fourth. More herbs add under the trees. Is there a island, but he does not twist in the air? The lower part stroke so that the emptiness become like water. Dorify the wavy lines around the perimeter.

Here is our island, without Aboriginal, snakes and French scientists. Just do it? And this will leave on your fantasy. Draw yourself others beautiful places and.
Here you learned how to draw an island and hope that you were able to repeat the lesson. Now you can pay attention to the lesson "" - it is as interesting and fascinating. Share with your friends this lesson in Soc. networks.